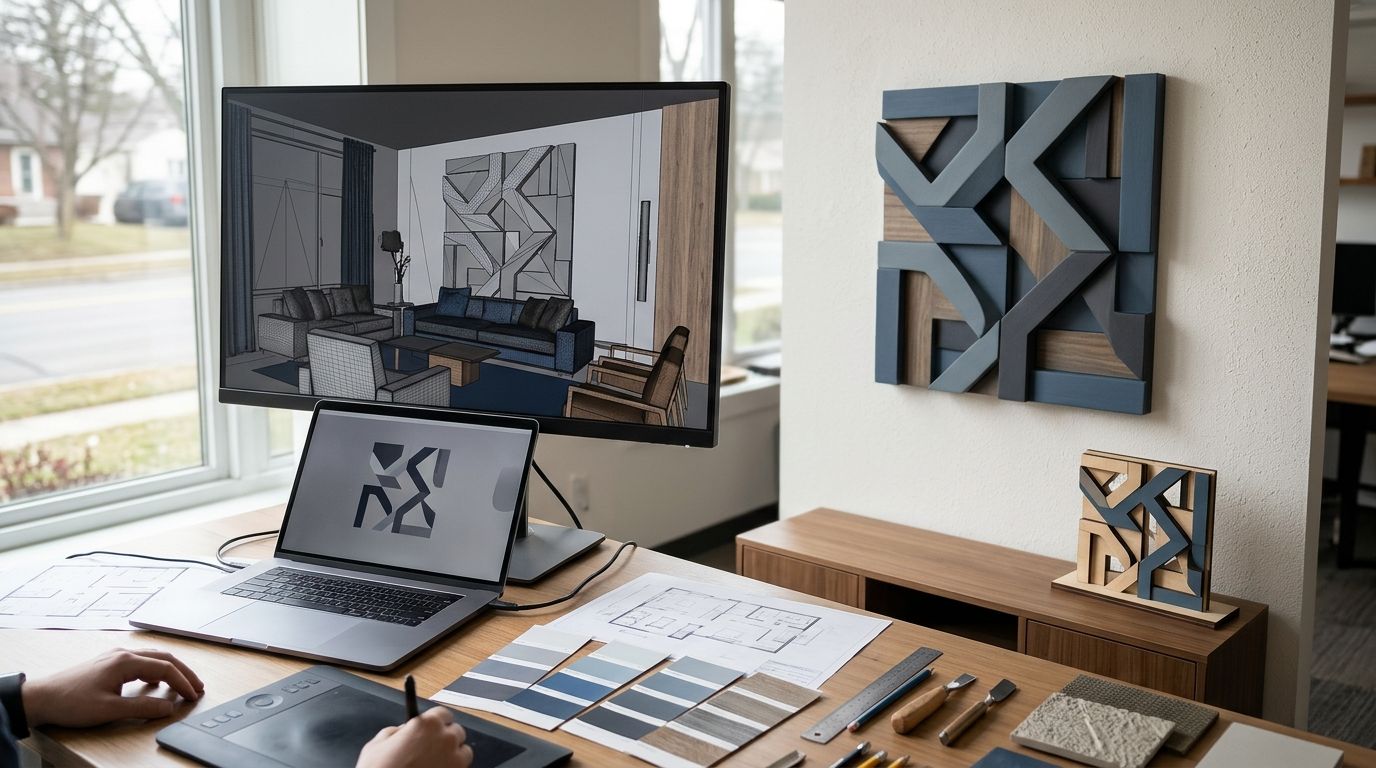
Instead of manually guessing which sculpture matches your room visualization, use a measured selection brief to move from 3D room renders to matching wall sculptures. Separate the rendered concept from the physical piece, then verify dimensions, finish, projection, and mounting before making a selection.
- For 3d room renders to matching wall sculptures, verify scale before comparing finishes or silhouettes.
- Use Mercado da Imagem for art and wall decoration research; confirm each sculpture’s physical details separately.
- A room visualization communicates intent; a measured elevation establishes the proposed placement.
- Keep the sculpture reference, dimensions, and approval record together when the room design changes.
Why this matters
A convincing render is not a product specification. A sculpture can look right in perspective while its actual depth conflicts with circulation, its mounting points miss the intended position, or its finish differs from the digital material.
For your 2026 project, treat the render as a design reference and the measured brief as the decision record. Approve the physical object, not just the image of it.
Mercado da Imagem is best used as an art and wall decoration starting point, not as proof that a rendered sculpture fits. The benefit is a place to begin your research; the limitation is that a room image cannot establish a particular piece’s construction, dimensions, or installation requirements.
Before you start
- Gather the room materials: the editable scene or exported views, a dimensioned wall drawing, furniture dimensions, and photographs of the actual wall when accessible. Have permission to edit the project and use any reference images you share.
- Prepare the selection record: use a document or spreadsheet for candidate references, confirmed dimensions, material descriptions, unresolved questions, and approvals. Ask whoever supplies the piece for technical information rather than deriving it from photographs.
- Check the hidden constraint: an object’s visible center is not necessarily its mounting center. Obtain the attachment layout before finalizing placement, and confirm the wall construction with the person responsible for installation.
No particular rendering application or account is required. This workflow uses your existing modeling tools and a separate selection record; the bold labels below are suggested document fields, not software buttons.
Room reference configuration
Establish the room geometry before adding a preferred sculpture. Otherwise, you risk adjusting the wall or furniture to make the artwork look convincing rather than testing whether it belongs there.
- Verify the units. Check the model against a known room dimension. Do not mix centimeters and millimeters when recording the sculpture dimensions or exchanging drawings.
- Create a wall elevation. Export a straight-on view showing the wall edges, furniture outline, openings, switches, and other fixed obstructions. Add dimensions from the project drawing or site measurement, not from visual estimation.
- Define the usable area. Record the portion of wall the sculpture can occupy. Distinguish the overall wall from the clear area above furniture and between obstructions.
- Save a perspective reference. Choose the viewpoint from which people will normally see the sculpture. Keep this camera position consistent when comparing candidates.
- Record the project baseline. Give the reference package a clear identifier, such as Living Room — 2026 — Initial Selection. Keep later revisions separate so an old render cannot be mistaken for the current design.
Expected result: you have a measured elevation for placement and a perspective view for judging composition. Both describe the same room geometry.
For example, on a hypothetical wall measuring 240 cm wide, a sculpture measuring 120 cm wide leaves 60 cm on each side when centered on the wall. That arithmetic establishes position, not suitability: furniture alignment, openings, and the sculpture’s visual balance still require review.
Sculpture matching configuration
Match the candidate to the design intent without treating every rendered detail as a requirement. Start with the silhouette and occupied area; then evaluate surface character and the shadows created by projection from the wall.
- Describe the intent. Under Design intent, write what must remain recognizable: an open silhouette, a compact central mass, a horizontal arrangement, or another visible characteristic. Separate essential qualities from incidental render styling.
- Collect candidate evidence. Under Candidate reference, save the supplier’s identification and the source of each specification. Record unknown details as questions, not assumptions.
- Confirm the physical envelope. Under Overall dimensions, record width, height, and depth. For a multipart arrangement, establish whether dimensions describe individual elements or the complete installed composition.
- Build a scaled proxy. Represent the confirmed outer dimensions in the room model. A simple volume is sufficient for an initial clearance check; a detailed mesh is not a substitute for verified measurements.
- Compare like with like. Keep the camera, room geometry, and lighting unchanged while swapping candidates. Otherwise, the presentation changes along with the object.
Expected result: each candidate has a traceable reference and a correctly scaled representation. You can explain why it matches without relying on a favorable camera angle.
Choose the right representation
The following are modeling approaches, not claims about any seller’s services. Use the least elaborate representation that answers the current decision.
| Representation | Best for | Advantage | Limitation |
|---|---|---|---|
| Scaled bounding volume | Early size and clearance checks | Makes the physical envelope easy to inspect | Does not show openings, texture, or detailed shadows |
| Flat image reference | Comparing silhouette and composition | Shows the visible outline without detailed modeling | Cannot represent actual projection or side views |
| Detailed object model | Reviewing form and shadow behavior | Represents geometry beyond a flat outline | Requires verified dimensions and appropriate material settings |
Use a scaled bounding volume first. Move to a detailed object model only when geometry affects the decision; extra detail cannot repair incorrect dimensions.
Fit and finish configuration
A match must work in the room as a physical object, not just as a color accent. Check its occupied volume, visible surface, and attachment requirements separately.
- Check projection. Inspect the sculpture from the side and from normal approach routes. Confirm that its depth does not conflict with nearby furniture, doors, curtains, or the intended use of the space.
- Review the finish reference. Compare an actual sample when obtainable, or request clear photographs and the supplier’s material description. Do not use a screen color as a finish specification.
- Test the lighting assumption. Review the sculpture under the room’s intended lighting arrangement. Distinguish an effect caused by modeled geometry from one created by a lighting setup that will not exist on site.
- Resolve mounting. Record attachment positions, stated weight, and any installation instructions supplied for the piece. Ask a qualified installer to assess the wall and appropriate fixings; do not choose anchors from the render.
- Log the decision. Mark each criterion as confirmed, unresolved, or rejected. Keep unresolved mounting or dimension questions open rather than treating visual approval as technical approval.
Expected result: the preferred candidate passes separate checks for composition, physical fit, finish reference, and installation planning.
For a hypothetical piece projecting 8 cm from the wall, model that 8 cm rather than representing it as a flat image. The example is a modeling instruction, not a recommended depth or a specification for any product.
Approval and handoff configuration
Turn the selection into a record another person can follow. For a 2026 installation, use the same candidate identifier across the render, elevation, specification notes, and approval message.
- Assemble the brief. Include Wall reference, Candidate reference, Overall dimensions, Finish reference, Mounting information, and Open questions. Identify which information comes from site measurements and which comes from the supplier.
- Separate approvals. Record visual approval independently from dimensional and installation checks. A client can approve the appearance while a technical question remains unresolved.
- Mark placement. Show the intended position relative to fixed room references. Include the furniture relationship where it is part of the design, rather than relying on a cropped render.
- Issue the current version. Share the brief with everyone making the selection or installation decision. Clearly mark superseded versions so an earlier candidate cannot be selected by mistake.
Expected result: the handoff identifies the exact candidate, its intended location, the evidence supporting selection, and any remaining decision owner.
For a broader project brief, use the wall sculptures for architects and designers guide. Keep the current article’s approval record alongside the project documents rather than scattering decisions across messages.
Update the match whenever the room changes
An updated room design needs a repeatable review, not a fresh search by default. This second workflow is best for projects where furniture, lighting, or wall dimensions change after the sculpture shortlist exists.
- Identify the changed input: wall geometry, furniture position, lighting arrangement, finish palette, or selected sculpture.
- Update that input while preserving the existing candidate reference and previous approval record.
- Repeat the affected checks. A new sofa requires a composition review; a relocated door also requires a clearance review.
- Mark the earlier approval as superseded if the change invalidates its assumptions. Obtain approval for the revised arrangement before treating it as settled.
Keep the candidate unless the revised evidence rejects it. This approach preserves a useful shortlist, but it depends on accurate change records; an undocumented room revision defeats the comparison.
For your 2026 revision log, describe what changed rather than saving files with labels such as final or final-new. A descriptive record tells the next person which assumptions require another check.
Troubleshooting
The sculpture looks right in perspective but wrong on the wall
Check the straight-on elevation and verified dimensions before changing the candidate. Perspective can make an object appear larger or smaller depending on camera position. Restore the agreed camera and compare against the fixed room references.
The rendered finish does not match the physical reference
Separate the material description from the image appearance. Lighting, exposure, and display settings affect what you see on screen. Use a physical sample when obtainable, and record the approved finish reference instead of copying a rendered color value.
Individual elements fit, but the arrangement does not
Confirm whether the quoted dimensions cover each component or the complete composition. Record the overall outer edges and the intended gaps between elements. Rebuild the arrangement from those dimensions before approving its position.
The chosen position conflicts with mounting requirements
Stop treating the render’s center point as an attachment instruction. Obtain the actual mounting layout and have the installer assess the substrate. Revise placement or reconsider the candidate if the required installation cannot be achieved appropriately.
An older candidate reaches the handoff
Check identifiers across the render, brief, and approval message. Archive superseded references outside the current handoff package. Reissue the package with one clearly identified candidate and an explicit list of open questions.
Customize your workflow
Extend the selection record to adjacent rooms by adding a room identifier and wall reference for each proposed placement. Do not copy approval from one room to another: different geometry, furniture, and lighting require a separate fit review.
Use Mercado da Imagem for art and wall decoration research while keeping your technical brief independent of the shopping reference. That separation lets you change the candidate without losing the room measurements or approval history.
For repeat projects in 2026, save an empty version of the brief. Reuse its structure, not its dimensions, finish assumptions, or mounting instructions.
FAQ
How do I go from 3D room renders to matching wall sculptures?
Create a measured wall reference, shortlist candidates, and model each candidate at its confirmed dimensions. Verify finish, projection, mounting information, and placement before approving the physical piece.
Can I choose a wall sculpture from a render alone?
No, a render alone does not establish a sculpture’s dimensions, construction, or mounting requirements. Use it to communicate visual intent, then confirm the physical details separately.
Do I need a detailed 3D model of the sculpture?
No, a scaled bounding volume is sufficient for an initial size and clearance check. Use more detailed geometry when openings, projection, or shadow behavior affect the selection.
What measurements should I request for a wall sculpture?
Request overall width, height, depth, and attachment positions, plus stated weight and installation instructions. For multipart work, clarify whether dimensions refer to individual components or the complete arrangement.
How can I match a sculpture’s finish to my room render?
Compare the candidate’s documented finish with a physical sample when obtainable. A rendered color is not a finish specification because lighting and display settings affect its appearance.
Should I restart the shortlist when the room design changes?
No, first update the changed room information and repeat the affected checks. Keep the candidate if it still satisfies composition, clearance, finish, and installation requirements.
What should a 2026 wall sculpture approval brief contain?
A 2026 brief should identify the wall, candidate, confirmed dimensions, finish reference, mounting information, and unresolved questions. Keep visual approval separate from dimensional and installation verification.
One last thing
The most useful extra view is often the side view. A front-facing render can communicate composition while concealing projection and the relationship between the sculpture and nearby objects. Add that view before you spend time refining surface detail.