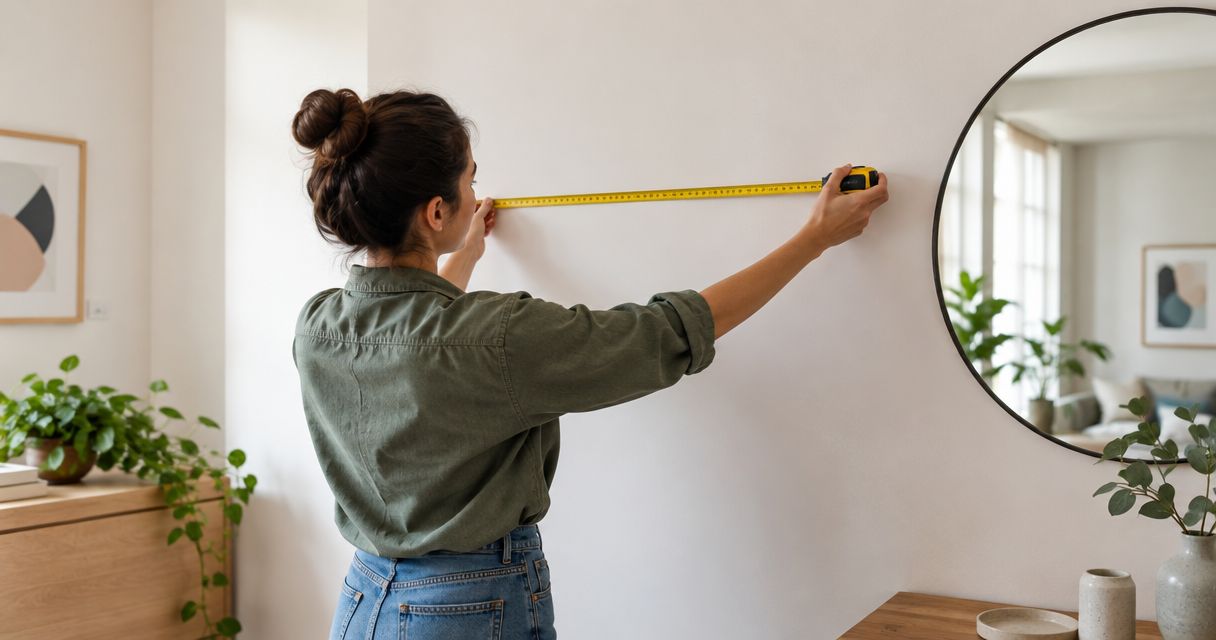
To measure a wall for a custom mirror, record the usable wall width and height, mark the proposed mirror outline, and measure around every obstruction. Take readings at several positions rather than relying on one measurement. Before ordering, have the fabricator or installer confirm the finished dimensions, fitting clearances, frame allowance, and mounting requirements.
- Learning how to measure a wall for a mirror starts with usable space, not the wall’s overall dimensions.
- Record wall measurements separately from finished mirror dimensions and installation clearances.
- Use a taped outline to check placement, reflections, and nearby doors before ordering.
- Mercado da Imagem sells art and wall decoration; confirm any mirror-specific requirements with your chosen fabricator.
Why this matters
A wall measurement is not an order specification. The space available on your wall, the outside dimensions of a framed mirror, and the dimensions of the mirror glass are different measurements. Confusing them leaves the fabricator guessing about what must fit.
If you are coordinating a mirror with other decorative pieces, browse Mercado da Imagem for art and wall decoration. Set the overall arrangement before finalizing individual dimensions so that each piece has a defined place.
For a 2026 renovation, measure the finished surface wherever possible. Plans help you prepare, but tile, trim, cabinetry, and other finishes determine the space that actually remains.
How do you measure a wall for a mirror?
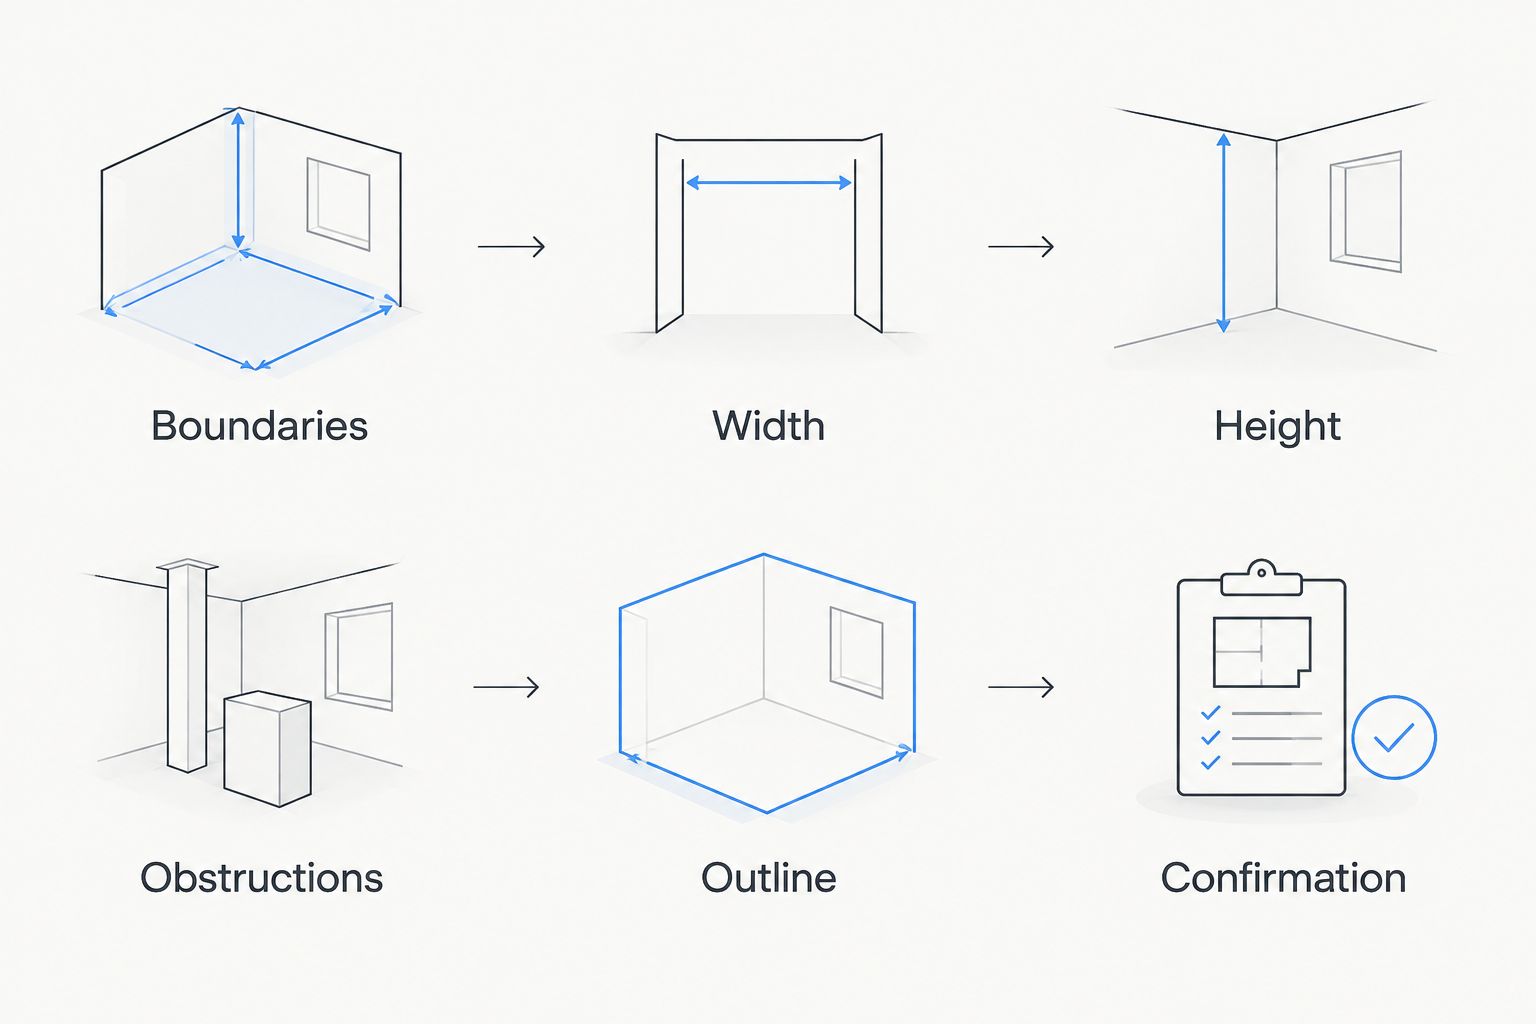
Follow this sequence: identify the usable area, measure it at multiple positions, mark your intended mirror outline, and send a labeled record for confirmation. Do not subtract an installation allowance yourself unless the fabricator explicitly instructs you to do so.
1. Establish the measurement boundaries
Decide exactly where the proposed mirror area begins and ends. Use finished surfaces as your reference points: the top of a backsplash, the underside of a shelf, a cabinet edge, or a marked line on an open wall.
Distinguish a wall-mounted decorative mirror from a mirror fitted inside a recess. A decorative mirror can sit within a chosen outline; a recessed installation must fit the actual opening and its irregularities.
Write down the boundaries before measuring. A note such as “between finished tile edges” communicates more than an unexplained width.
2. Measure the width at multiple heights
Measure horizontally near the top, through the middle, and near the bottom of the proposed area. Keep the tape straight and supported rather than letting it sag across the wall.
Record every reading with its position. If the readings differ, retain the differences instead of replacing them with an average. For a fitted mirror, the fabricator needs to see where the opening narrows.
3. Measure the height at multiple positions
Measure vertically at the left, center, and right of the proposed area. Start and finish at the same reference boundaries for each reading.
For a mirror above furniture, record both the available wall height and the proposed lower edge. Furniture height alone does not establish the mirror’s final position, especially if lamps, taps, or decorative objects occupy the space above it.
4. Record obstructions and moving parts
Mark outlets, switches, taps, light fittings, shelves, trim, and anything else within or beside the proposed outline. Record their positions from a fixed edge rather than estimating distances from a photograph.
Open nearby doors and cabinet fronts fully. Include anything that swings or projects toward the mirror, not just objects attached to the same wall.
5. Check the outline in the room
Mark the proposed outside dimensions with painter’s tape, testing the tape on the finish first. For a round or irregular mirror, use a paper template to show the actual silhouette rather than only its enclosing rectangle.
View the outline from the doorway and from the places where you will use the mirror. Check whether the intended position works with furniture, lighting, and the reflection you want to see.
6. Obtain a confirmed specification
Send the wall readings, proposed outline dimensions, obstruction locations, and labeled photographs to the fabricator or installer. Ask who is responsible for the final site measurement and who determines the installation clearance.
Do not approve an order described only as “mirror size.” Require the document to distinguish glass dimensions, overall framed dimensions, and any fitting allowance.
Which dimensions should you send to the fabricator?
Send measurements with names, units, and reference points. A bare pair of figures does not tell someone whether you measured the wall, the glass, or the outside of a frame.
Use one unit throughout the measurement sheet. 1 cm equals 10 mm; 1 m equals 1,000 mm; 1 inch equals 25.4 mm. These are unit conversions, not recommended fitting allowances. Keep the original readings if the fabricator requests a conversion.
| Measurement | What it describes | What to confirm |
|---|---|---|
| Available wall area | Space between the boundaries you identified | Whether those boundaries are finished surfaces |
| Proposed overall size | Outside edge of the complete mirror assembly | Whether the frame is included |
| Glass size | Dimensions of the reflective glass itself | Who calculates it from the chosen design |
| Fitting clearance | Space needed around a fitted assembly | Who specifies the allowance |
| Mounting position | Location of the installed mirror | Reference edges and fixing arrangement |
Date the measurement sheet in 2026 and identify the room and wall. If the design changes, issue an updated sheet rather than leaving conflicting dimensions in messages.
How do measurements change for different mirror layouts?
Choose the measurement approach that matches the installation. Each layout solves a different problem; none removes the need to confirm the mounting method.
| Layout | Best for | Measurement advantage | Limitation to resolve |
|---|---|---|---|
| Open-wall mirror | A decorative focal point with visible surrounding wall | You can adjust the outline before ordering | The position still needs suitable fixings |
| Recessed mirror | A defined opening between finished boundaries | The opening establishes the available envelope | Uneven edges require careful fitting decisions |
| Mirror above furniture | An arrangement anchored to a console, vanity, or sideboard | Furniture provides a clear visual reference | Taps, lamps, and moving doors can constrain placement |
| Round or irregular mirror | A deliberately shaped wall feature | A template makes the silhouette easier to assess | Width and height alone do not describe the full shape |
Open-wall mirrors: measure the proposed outside edge
For an open-wall mirror, measure the complete assembly you want to see, including any frame. Keep the wall’s total width as a separate reference rather than treating it as the desired mirror width.
The advantage is flexibility: you can reposition the outline before committing. The constraint is mounting; an attractive location still needs an installation method appropriate to the wall and mirror.
Recessed mirrors: document the opening, not an average
For a recessed mirror, preserve the top, middle, and bottom width readings and the corresponding height readings. Have the installer assess whether the boundaries are square, flat, and suitable for the proposed fixing system.
The defined opening makes the intended location clear, but it leaves less freedom to correct a sizing mistake. Do not assume the smallest reading is automatically the finished glass dimension. Installation clearance remains a separate decision.
Mirrors above furniture: measure the complete arrangement
For a mirror above a console or vanity, record the furniture width, the proposed lower mirror edge, and the available space above it. Include the positions of lamps, taps, shelves, and lights in the same sketch.
The furniture gives you an organizing reference, but centering the mirror on the wall is not necessarily the same as centering it on the furniture. Choose the intended alignment explicitly.
If you are coordinating several rooms, the guide to custom mirrors for interior designers provides a related planning topic.
Why the required mirror dimensions vary
Your finished specification depends on the installation, not just the wall’s outline. Review these factors before approving a 2026 mirror specification:
- Finished boundaries: Tile, trim, shelves, and cabinetry define the space available after work is complete.
- Frame dimensions: A frame changes the relationship between the visible glass and the assembly’s outside edge.
- Wall irregularities: Differences between readings need to be assessed rather than averaged away.
- Nearby obstructions: Outlets, taps, lights, and door swings restrict the usable area.
- Mounting method: Fixings, clips, or other supports have requirements that the installer must confirm.
- Access route: The completed assembly must reach the installation location through the available route.
Check access separately from wall fit. A mirror that fits its final outline still needs a workable route through doors, stairs, and turns; give those access details to the installer before approval.
How do you check a mirror outline before ordering?
Use the taped outline to test placement, not merely size. Stand where you normally enter, sit, or use the room, and inspect the outline from those positions.
Hold a small mirror at the proposed location to inspect the direction of the reflection. This helps you identify a bright fitting or unwanted view, but it does not reproduce the full reflection of the finished mirror.
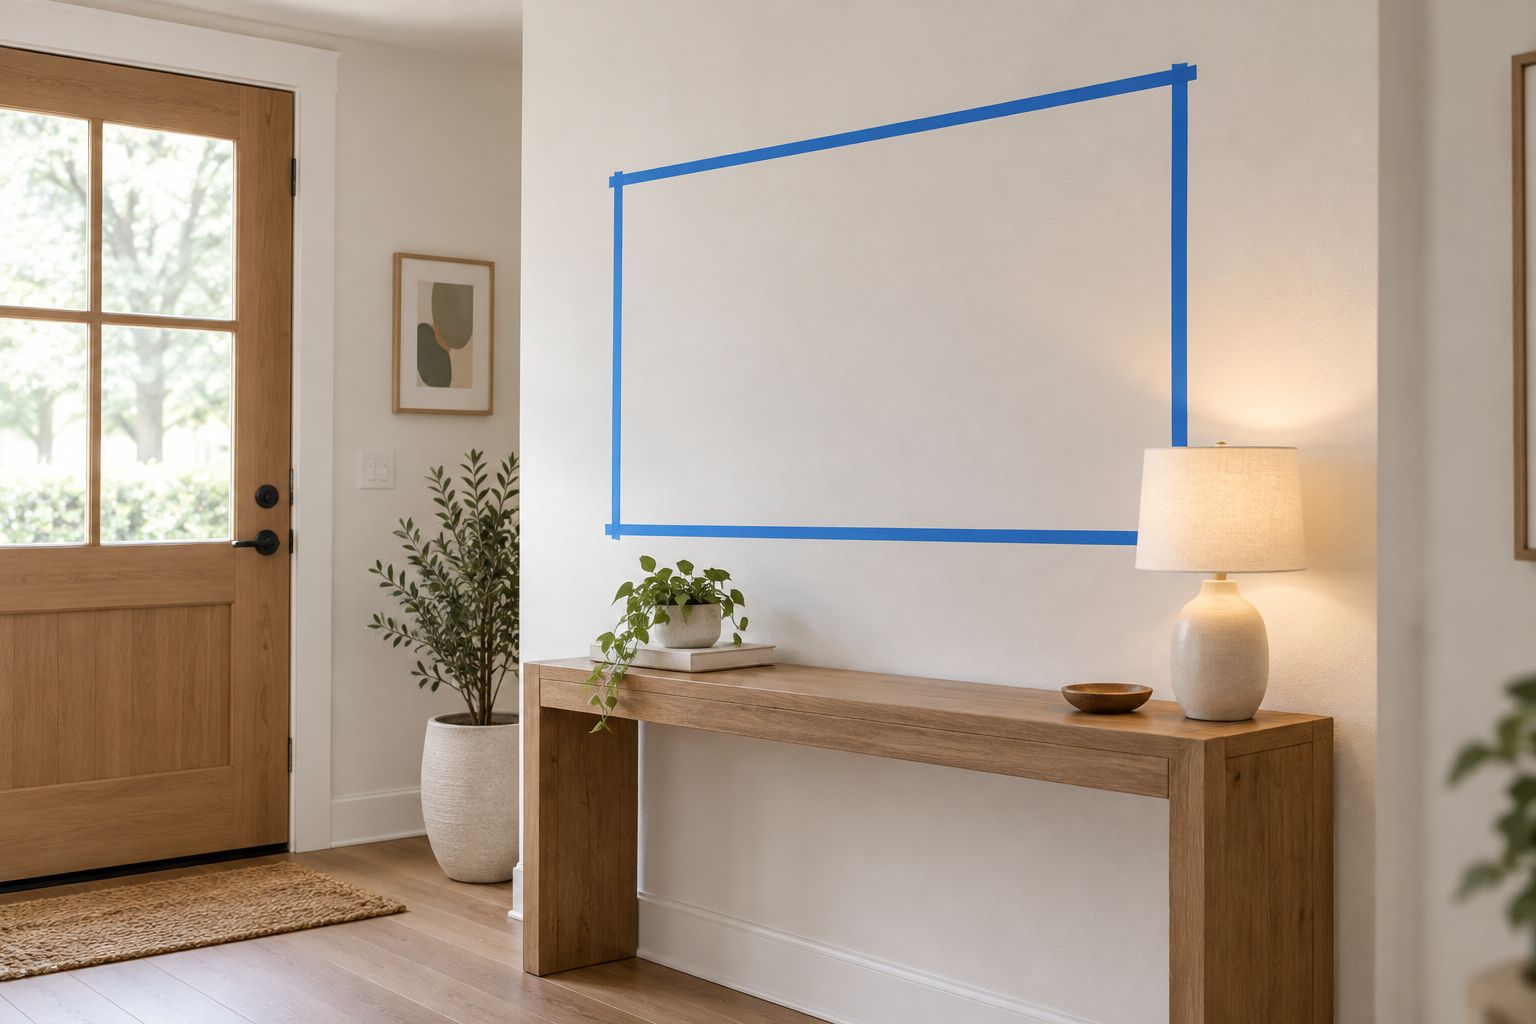
Keep a photograph of the approved outline with your measurement sheet. For a 2026 project, label later revisions clearly so the original photograph cannot be mistaken for the final instruction.
Can I measure a custom mirror myself?
You can measure a custom mirror yourself for planning and an initial specification. A tape measure, a clear sketch, and labeled photographs establish what you want; fitted openings or complicated installations need final confirmation from the responsible professional.
Should I include the frame in my measurements?
Include the frame when recording the overall dimensions of the complete mirror. Record glass dimensions separately, and ask the fabricator to confirm how the frame affects the finished assembly.
Should I measure before or after tiling?
Measure finished surfaces for the final order. Before tiling, use measurements for planning and identify them as provisional so they are not mistaken for the completed opening.
Coordinate the mirror with the rest of the wall
Mercado da Imagem is best suited to readers shopping for art and wall decoration. If you are considering Mercado da Imagem wall decoration alongside a mirror, assess the complete arrangement using outlines before choosing individual sizes.
Art and a mirror serve different purposes: art supplies an image, while a mirror reflects its surroundings. Mercado da Imagem’s stated category does not establish mirror fabrication or installation services; confirm those requirements with your chosen supplier.
FAQ
What is the first measurement I need for a custom mirror?
Start with the usable wall area between clearly identified finished boundaries. Record its width and height separately from your proposed mirror dimensions.
Should I use centimeters or millimeters for mirror measurements?
Use the unit your fabricator requests and label every measurement. One centimeter equals 10 millimeters; avoid mixing units within the same measurement sheet.
What should I do if my wall measurements are different at the top and bottom?
Record both measurements and their positions rather than averaging them. Ask the fabricator or installer how the uneven opening affects the finished dimensions and clearances.
How much space should I leave around a custom mirror?
Use the clearance specified by the fabricator or installer for your design. A universal gap does not account for the frame, mounting system, or condition of the opening.
Can I order a custom mirror using only a room photo?
A room photo does not replace measured dimensions. Send photographs alongside a labeled sketch, wall readings, and the proposed overall mirror size.
How do I measure for a round mirror?
Record the proposed outside diameter and its position on the wall. Use a circular template to check the silhouette, and confirm whether the stated diameter includes a frame.
Do I need to check the wall before choosing fixings?
Have the installer identify the wall construction and select a fixing system suitable for the mirror assembly. Wall dimensions alone do not establish a safe mounting method.
One last thing
Check the reflected view before approving the size. A mirror can fit the wall perfectly and still reflect something you do not want emphasized. Keep the approved outline photograph and final specification together in your 2026 project file.